Office 365 OAuth SSO Setup in ToolWorks
You can use Microsoft Office 365 (Microsoft Azure AD) as an OAuth (SAML) / OIDC provider for Single Sign-On (SSO) in ToolWorks. Following these steps will allow you to configure OAuth / SSO between Office 365 and ToolWorks such that your users will be able to log in to ToolWorks using their Office 365 credentials.
Prerequisites
- You must have an active Office 365 subscription with admin access to the Azure Active Directory (Azure AD) portal.
- You must have admin access to your ToolWorks instance with Administer SSO right assigned. (Enterprise Edition).
Step 1: Register ToolWorks as an Application in Azure AD
- Log in to the Azure Portal with your admin credentials.
- Navigate to Azure Active Directory > App registrations. 💡 If you don't see "App registrations", use the search bar at the top of the portal to search for "App registrations" or click on "More services" and find it under "Identity".
- Click on New registration.
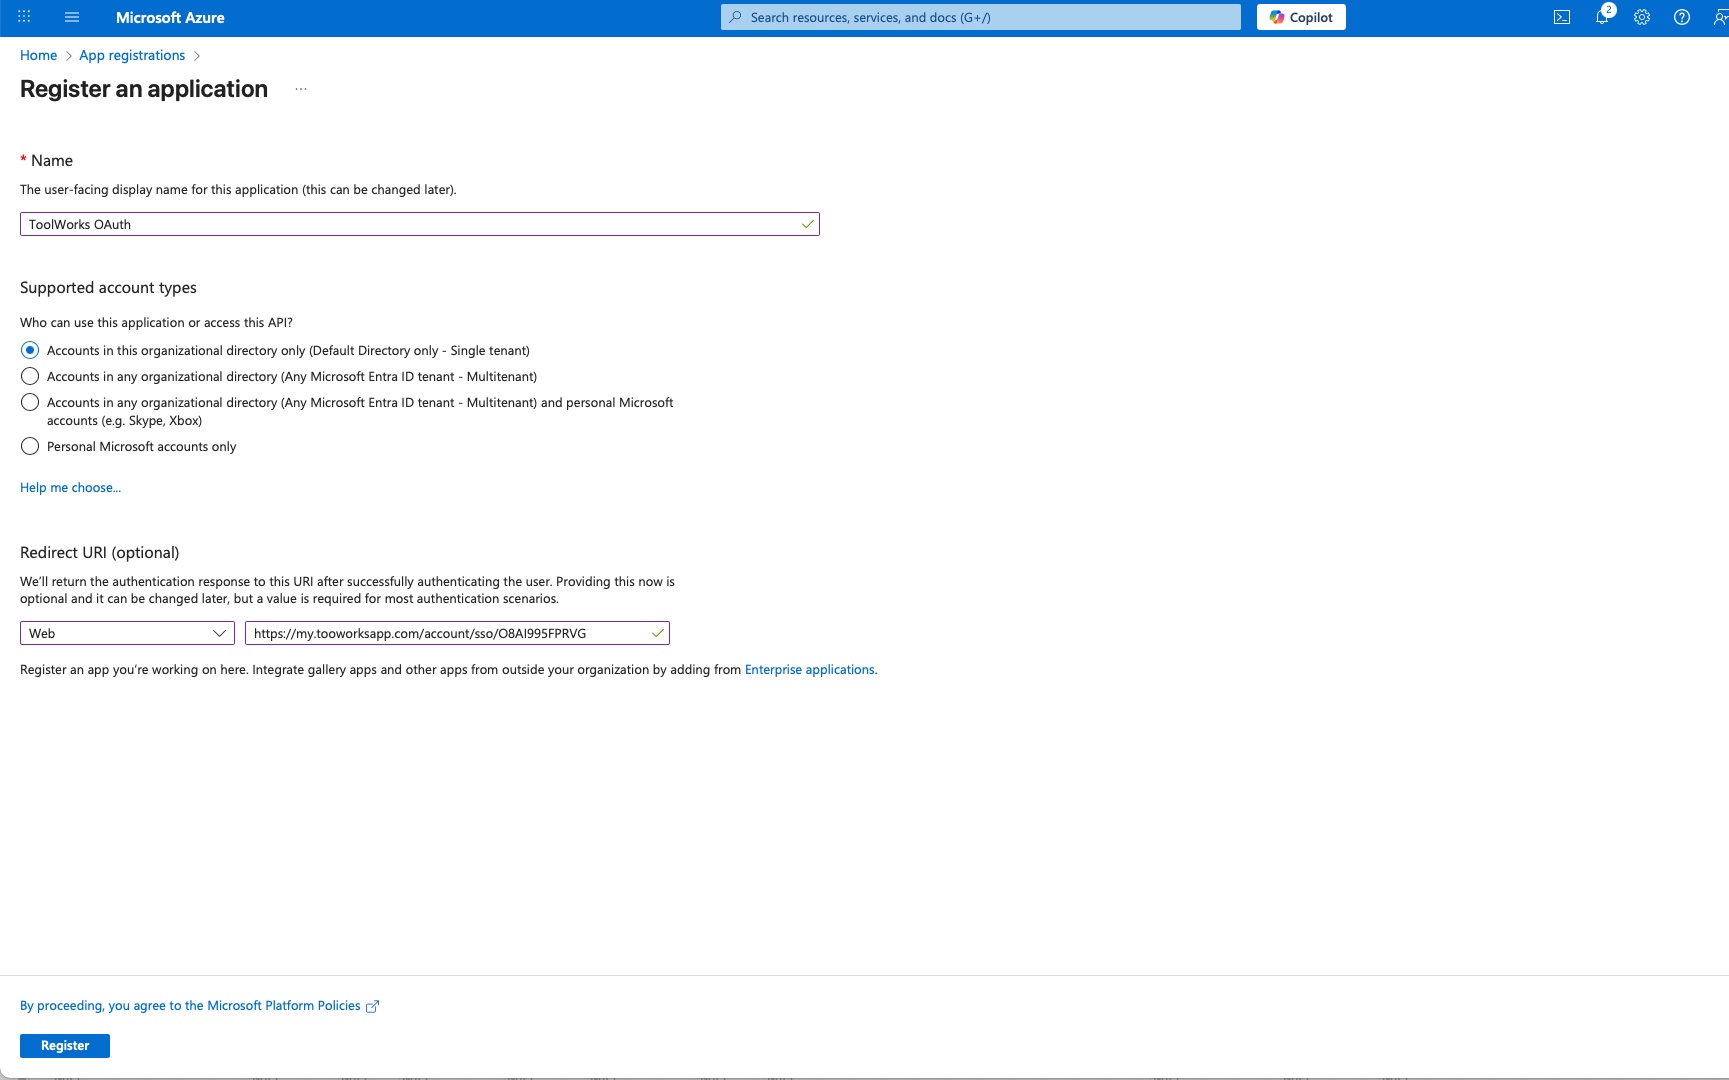
- Fill in the following details:
- Name: ToolWorks SSO
- Supported account types: Choose based on your requirement (e.g., Accounts in this organizational directory only).
- Redirect URI: Select "Web" and enter the redirect URI for your ToolWorks instance (for instance,
https://my.toolworksapp.com/account/sso/your-company-domain-name.com). You can find this URI in your ToolWorks Account settings page, clickEditto view OAuth details and copy Return Url. If you don't see OAuth details, clickAdd OAuth/Single Sign-Onbutton to get the redirect URI.
- Click Register.
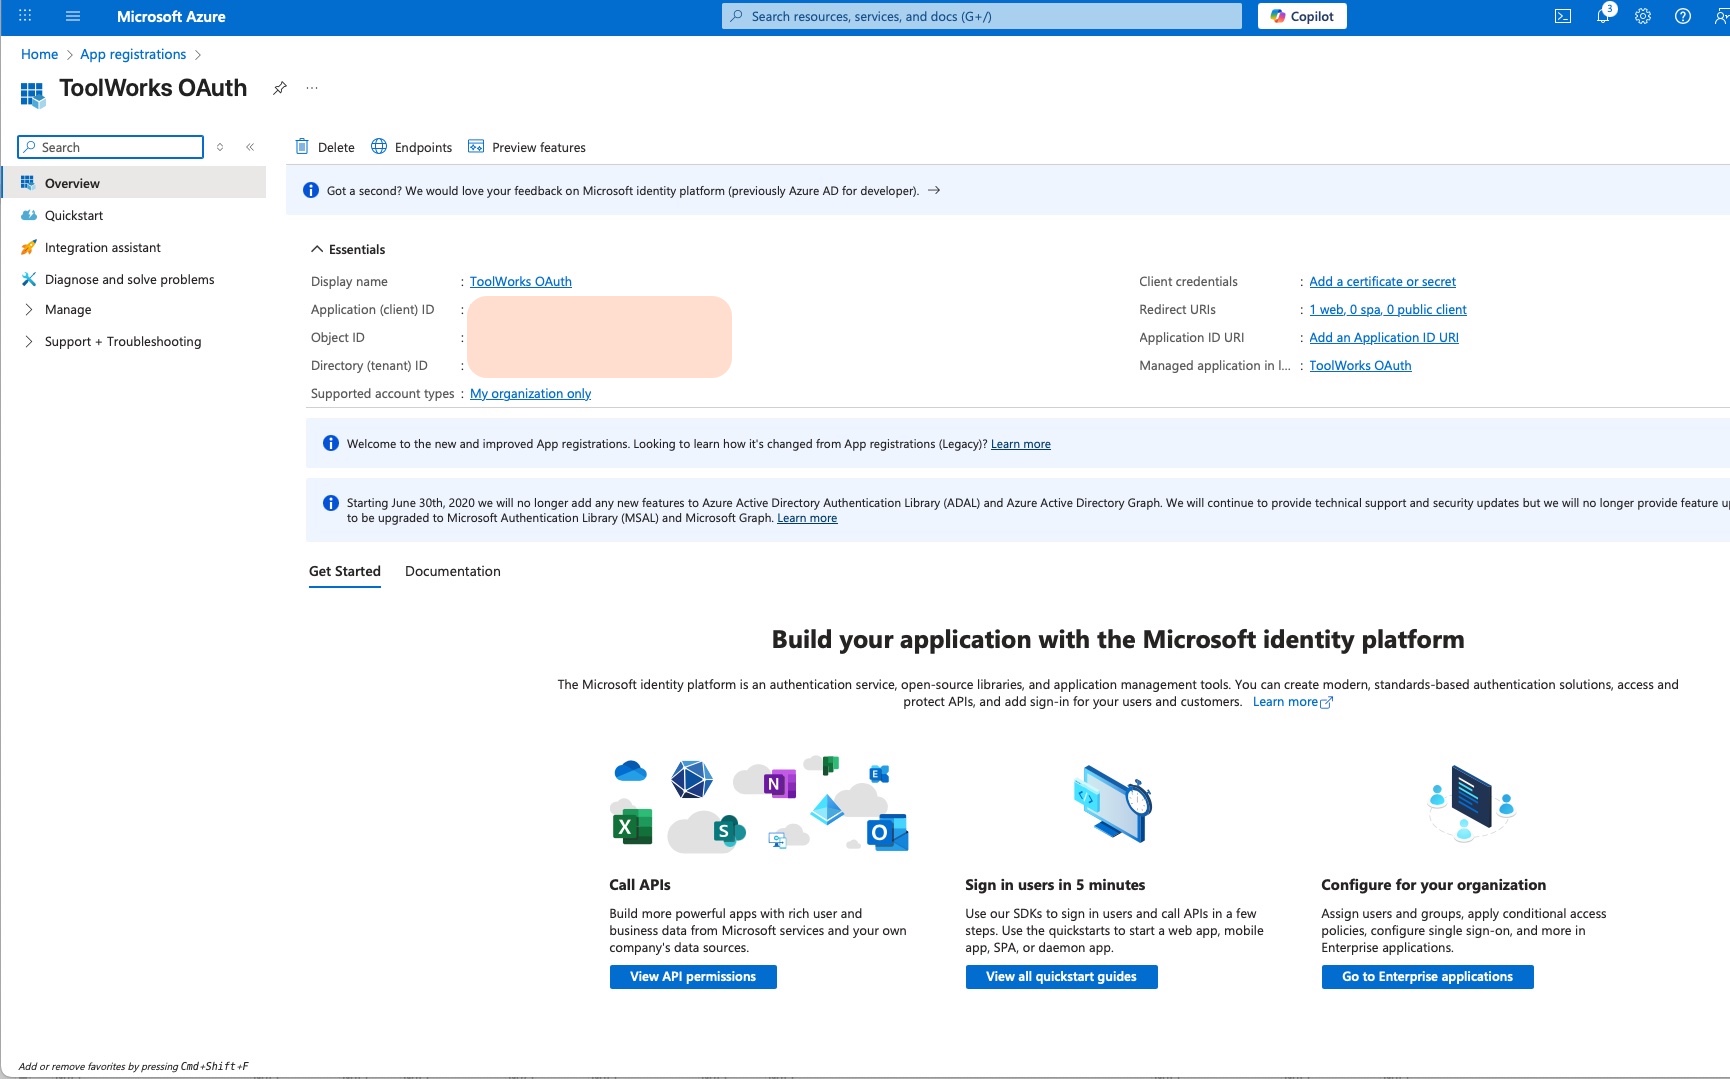
- After registration, note down the Application (client) ID and Directory (tenant) ID from the overview page.
Step 2: Configure Authentication Settings
- In the registered application, navigate to Authentication.
- Under Platform configurations, click on Add a platform and select Web.
- Ensure the redirect URI you entered during registration is listed. If not, add it now.
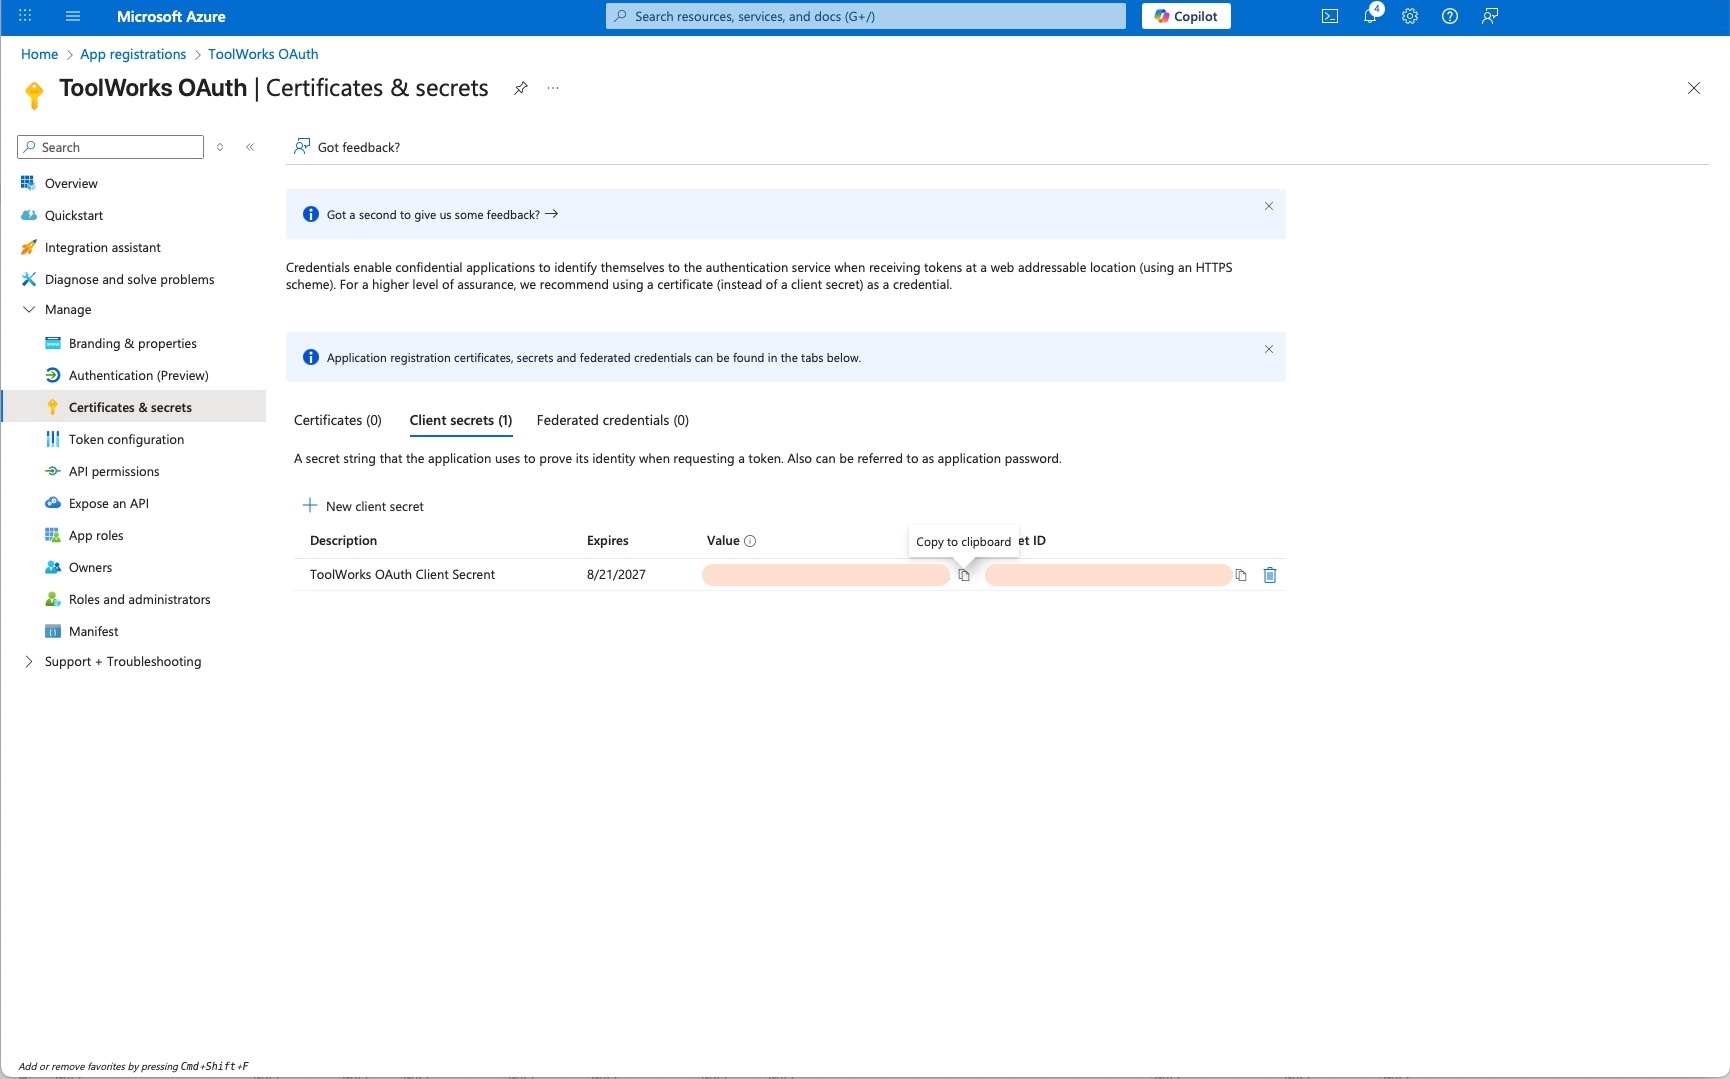
Step 3: Create a Client Secret
- Navigate to Certificates & secrets.
- Click on New client secret.
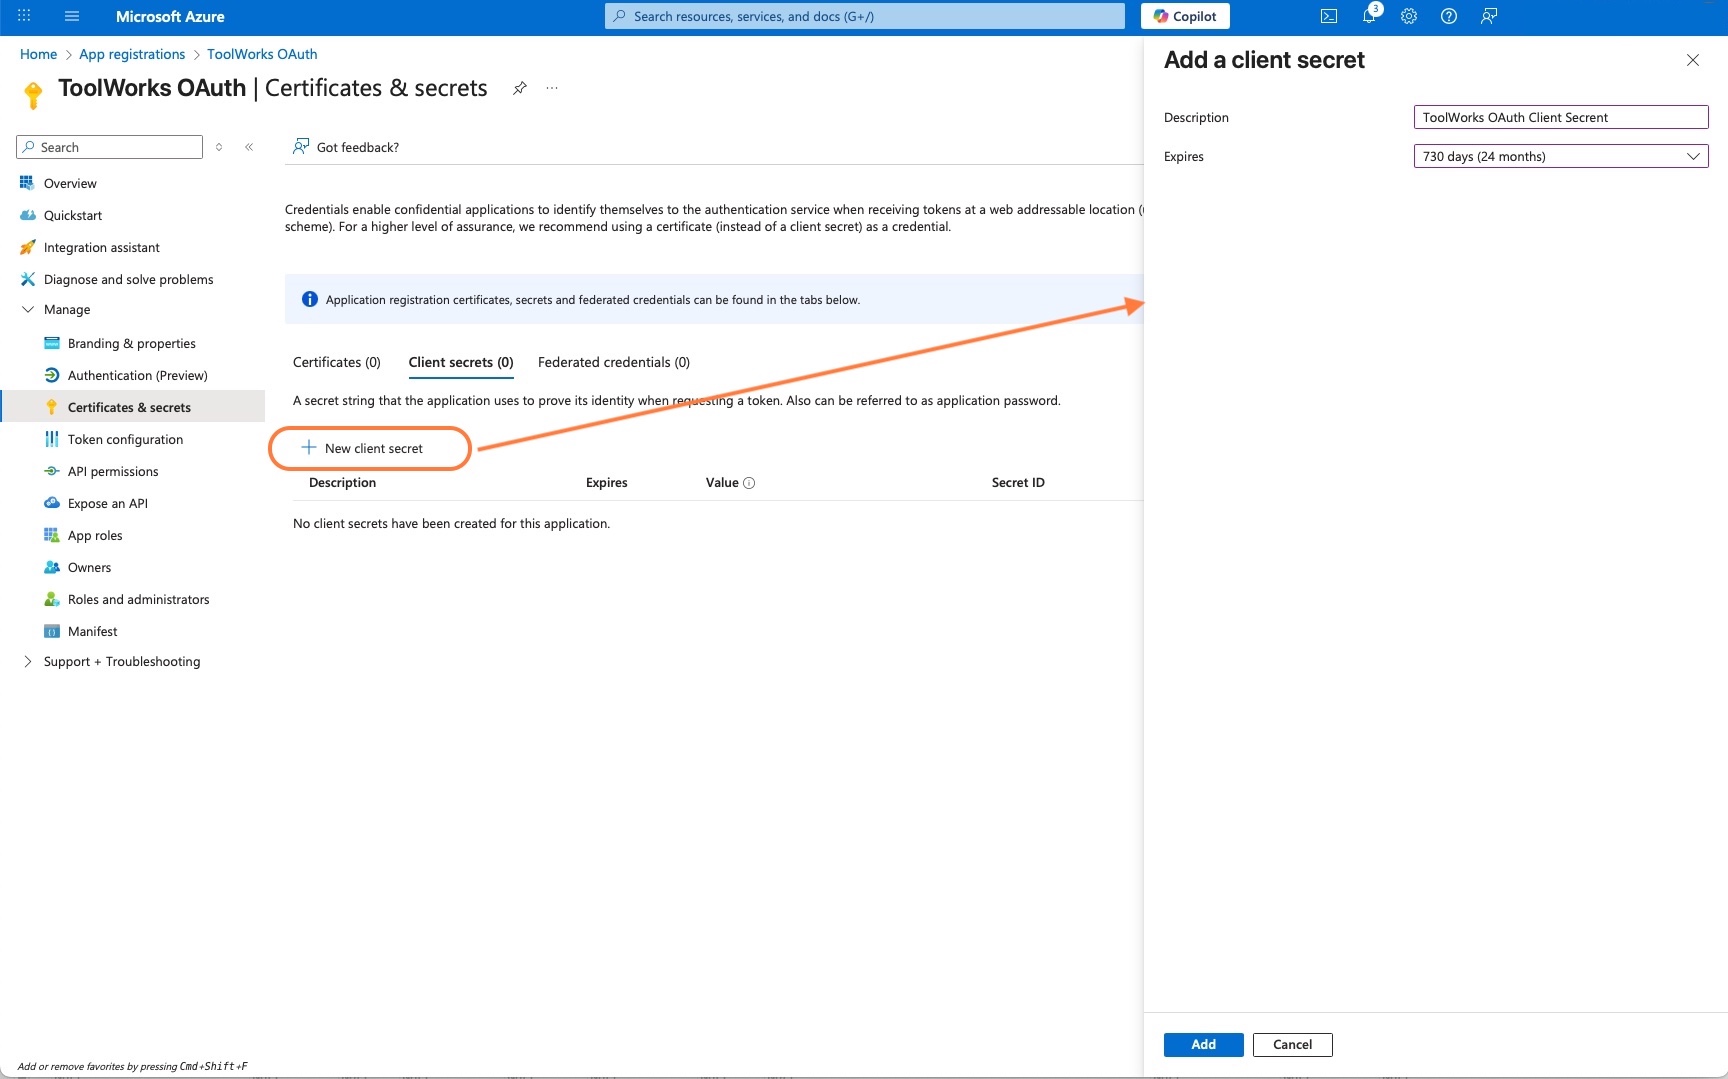
- Provide a description (e.g., ToolWorks SSO Secret) and set an expiration period.
- Click Add.
- Copy the generated client secret Value immediately as it will be hidden later. You will need this for ToolWorks configuration.
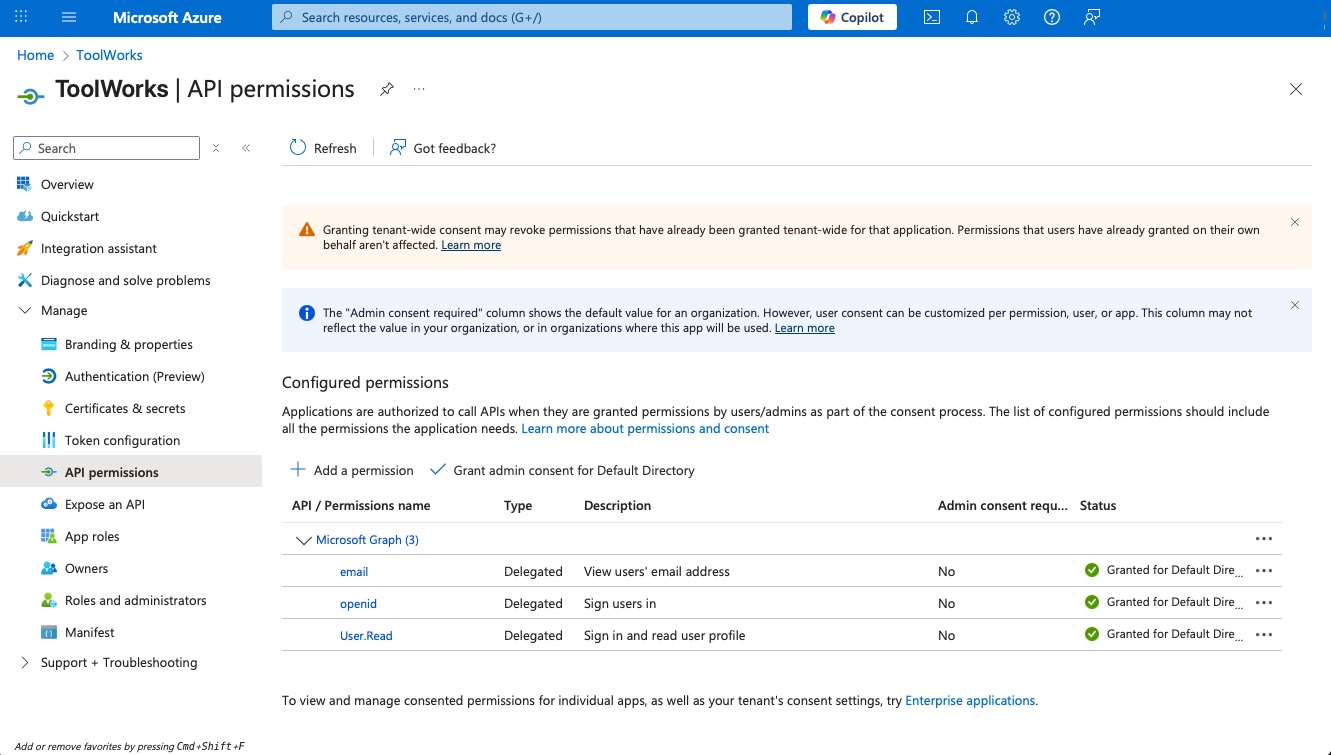
Step 4: Configure API Permissions
- Navigate to API permissions.
- Click on Add a permission.
- Select Microsoft Graph.
- Choose Delegated permissions and add the following permissions:
openidprofileemail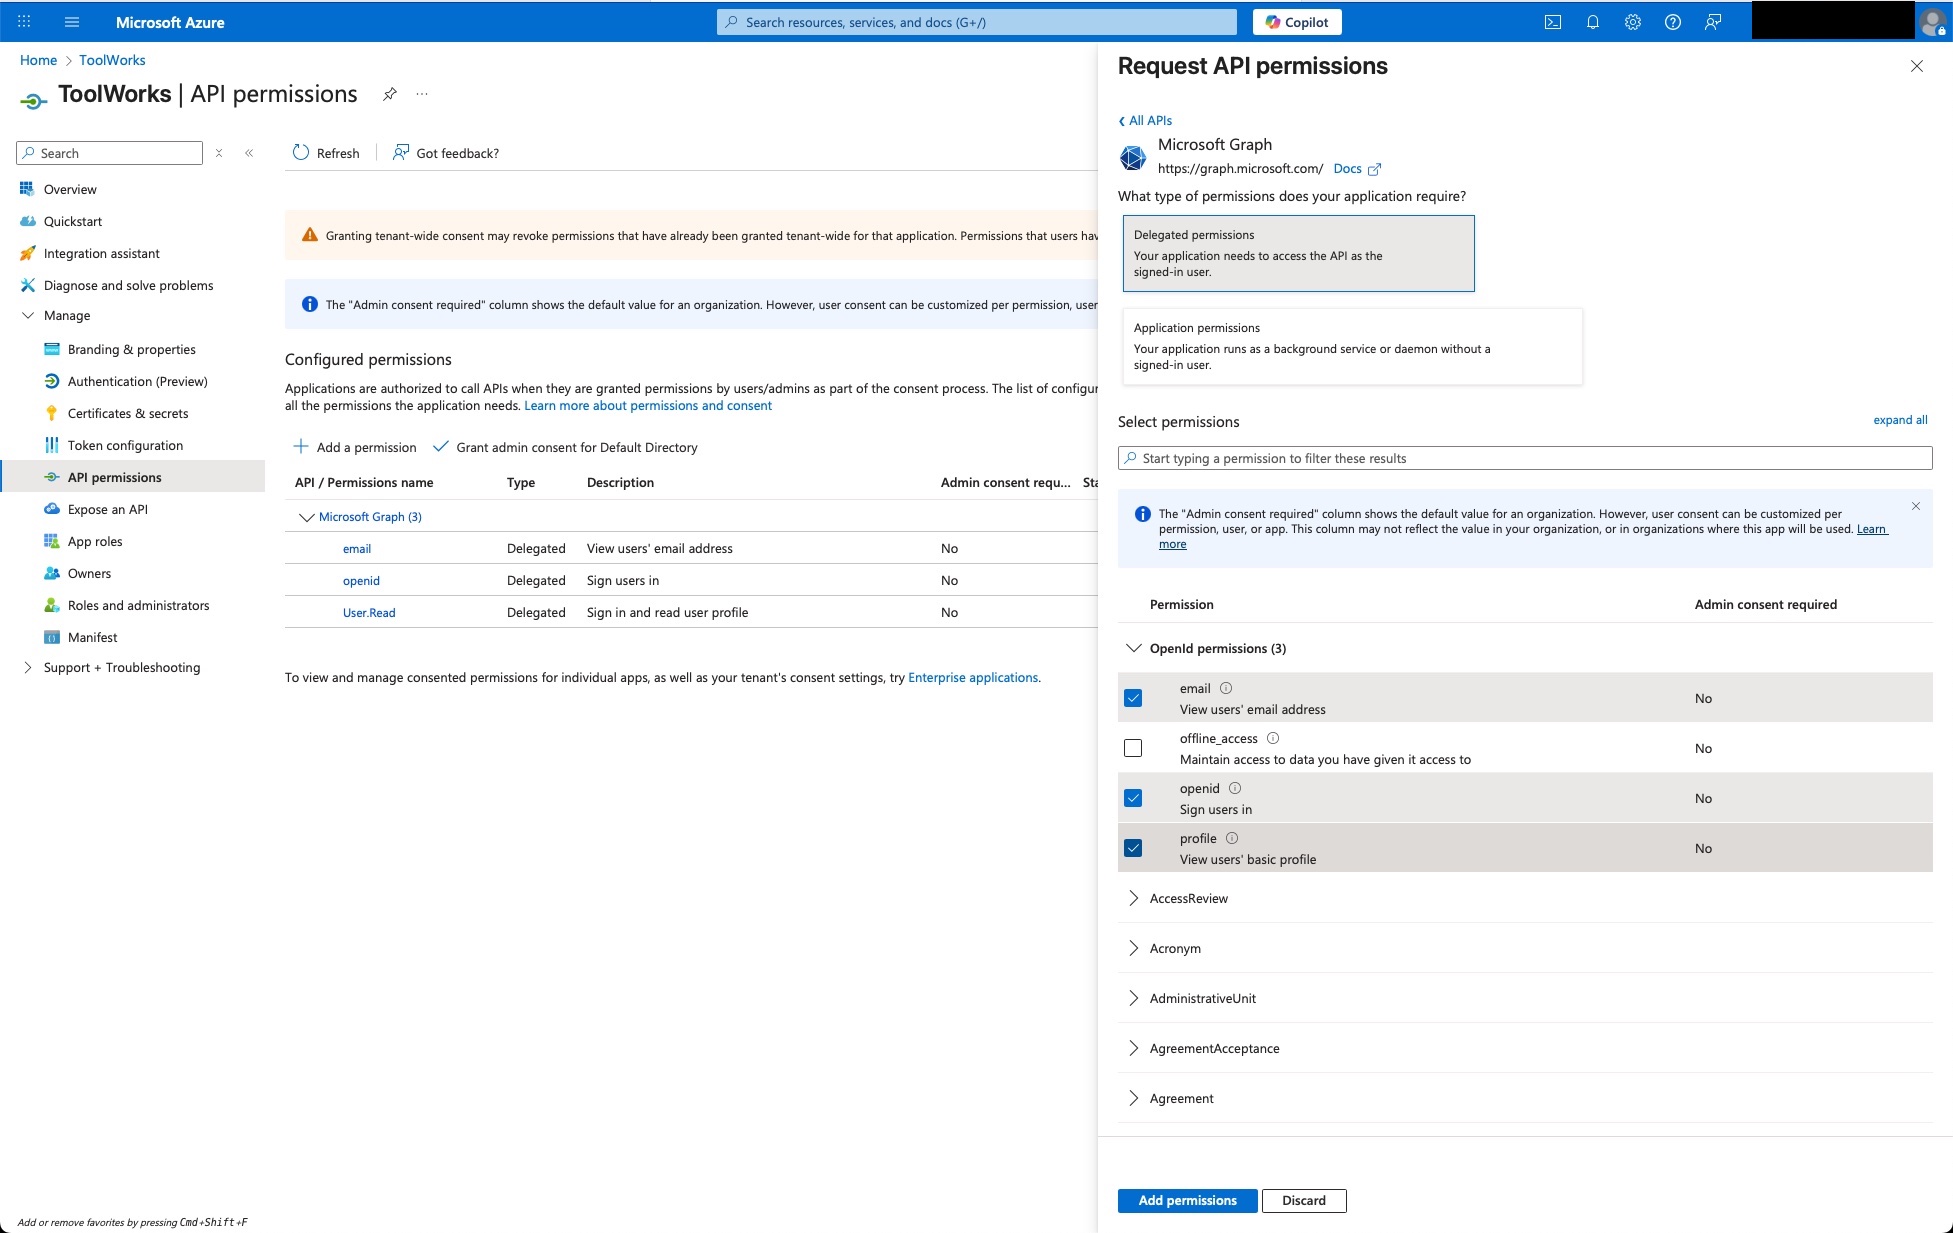
- Click Add permissions.
- Click on Grant admin consent for [Your Organization] to grant the permissions.
Step 5: Configure ToolWorks for OAuth SSO
- Log in to your ToolWorks instance as an admin.
- Navigate to Settings > Account > click
Edit. - Click on
Add OAuth/Single Sign-On.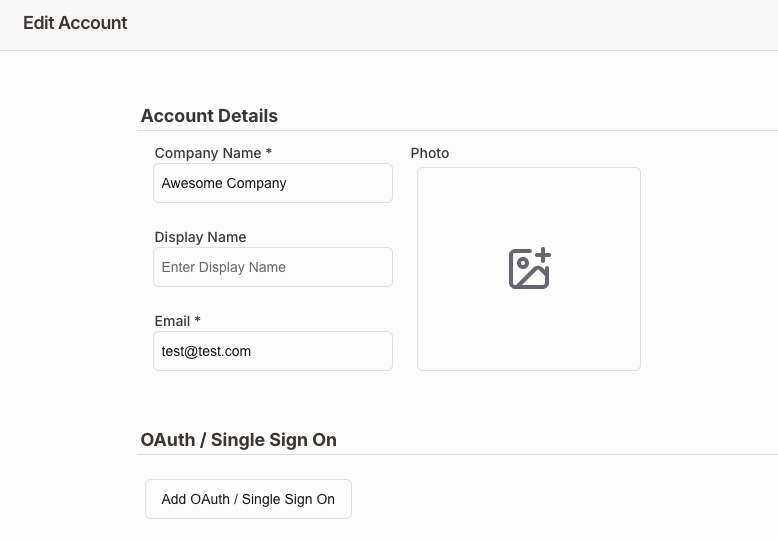
- Fill in the following details:
- Authorization Url: Copy the
OAuth 2.0 authorization endpoint (v2)URL from Endpoints at Azure portal > Azure Active Directory > App registrations > Your App(ToolWorks SSO) > Endpoints. Alternatively, you can use the format:https://login.microsoftonline.com/{tenant-id}/oauth2/v2.0/authorize(replace{tenant-id}with your Directory (tenant) ID).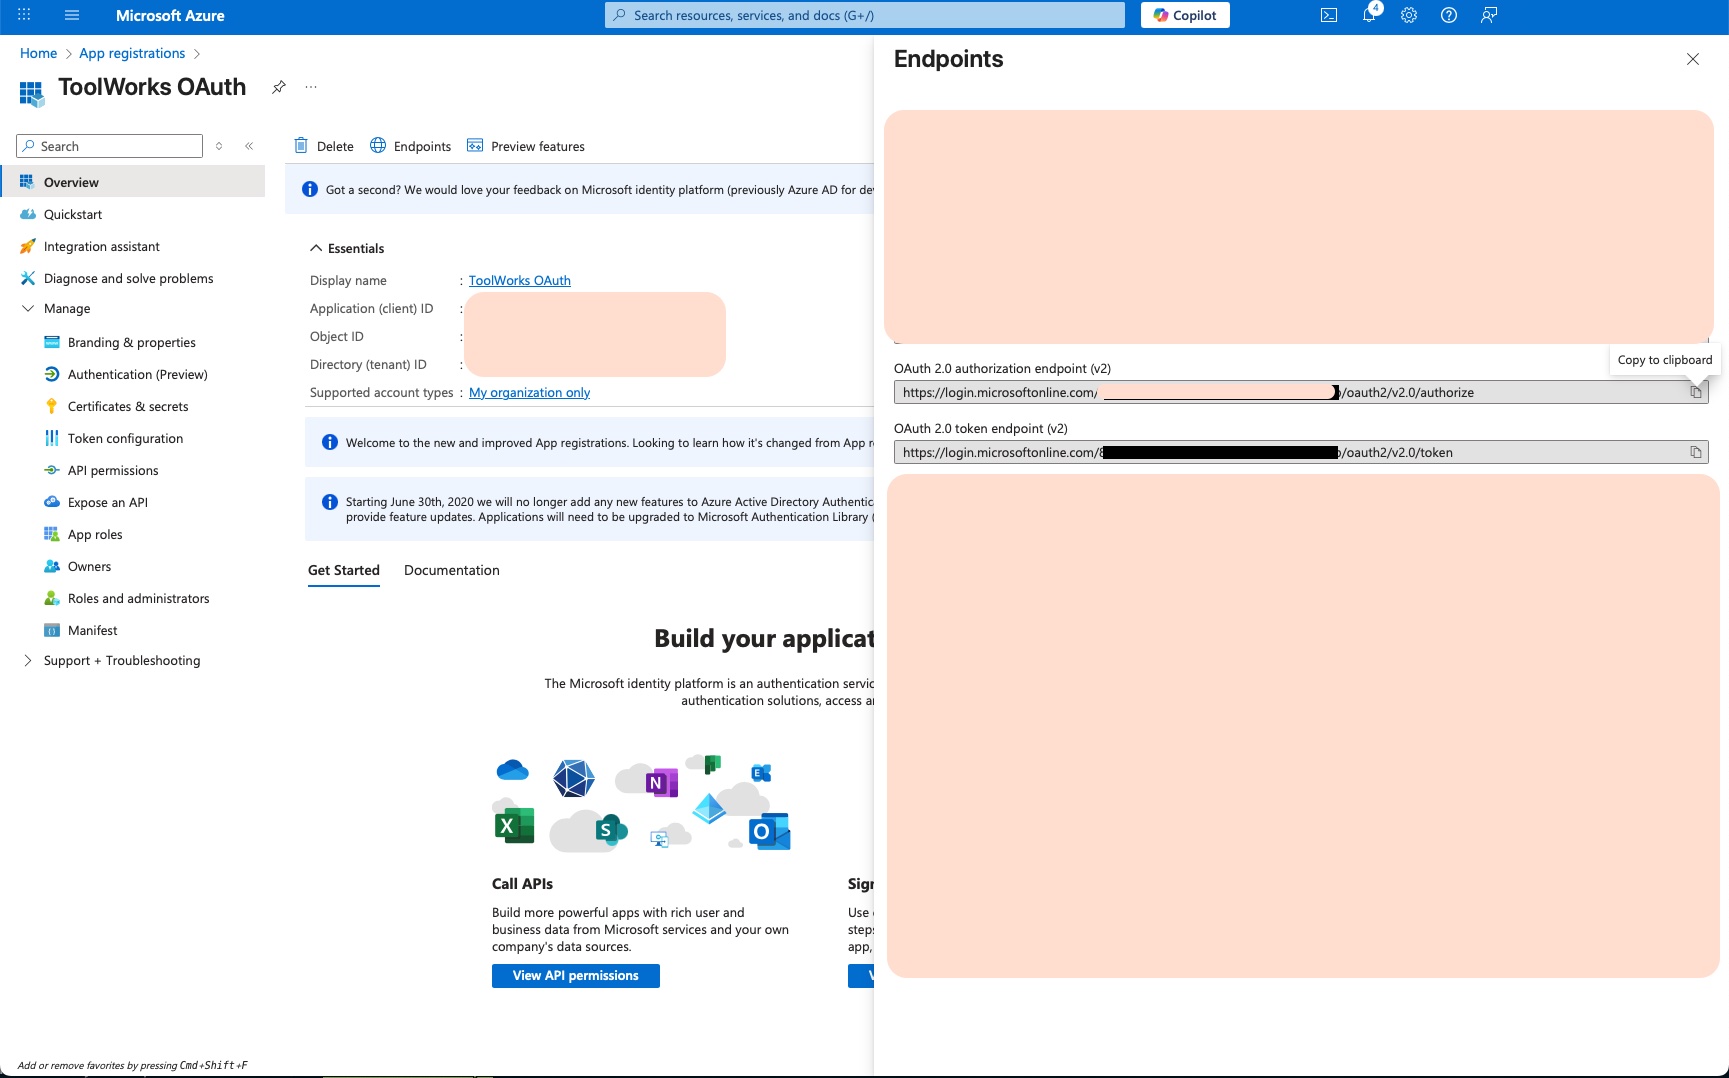
- Token Url: Copy the
OAuth 2.0 token endpoint (v2)URL from Endpoints at Azure portal > Azure Active Directory > App registrations > Your App(ToolWorks SSO) > Endpoints. Alternatively, you can use the format:https://login.microsoftonline.com/{tenant-id}/oauth2/v2.0/token(replace{tenant-id}with your Directory (tenant) ID). - Client ID: Enter the Application (client) ID from Step 1. Alternatively, copy from the Azure portal > Azure Active Directory > App registrations > Your App(ToolWorks SSO) > Overview.
- Client Secret: Enter the client secret value from Step 3.
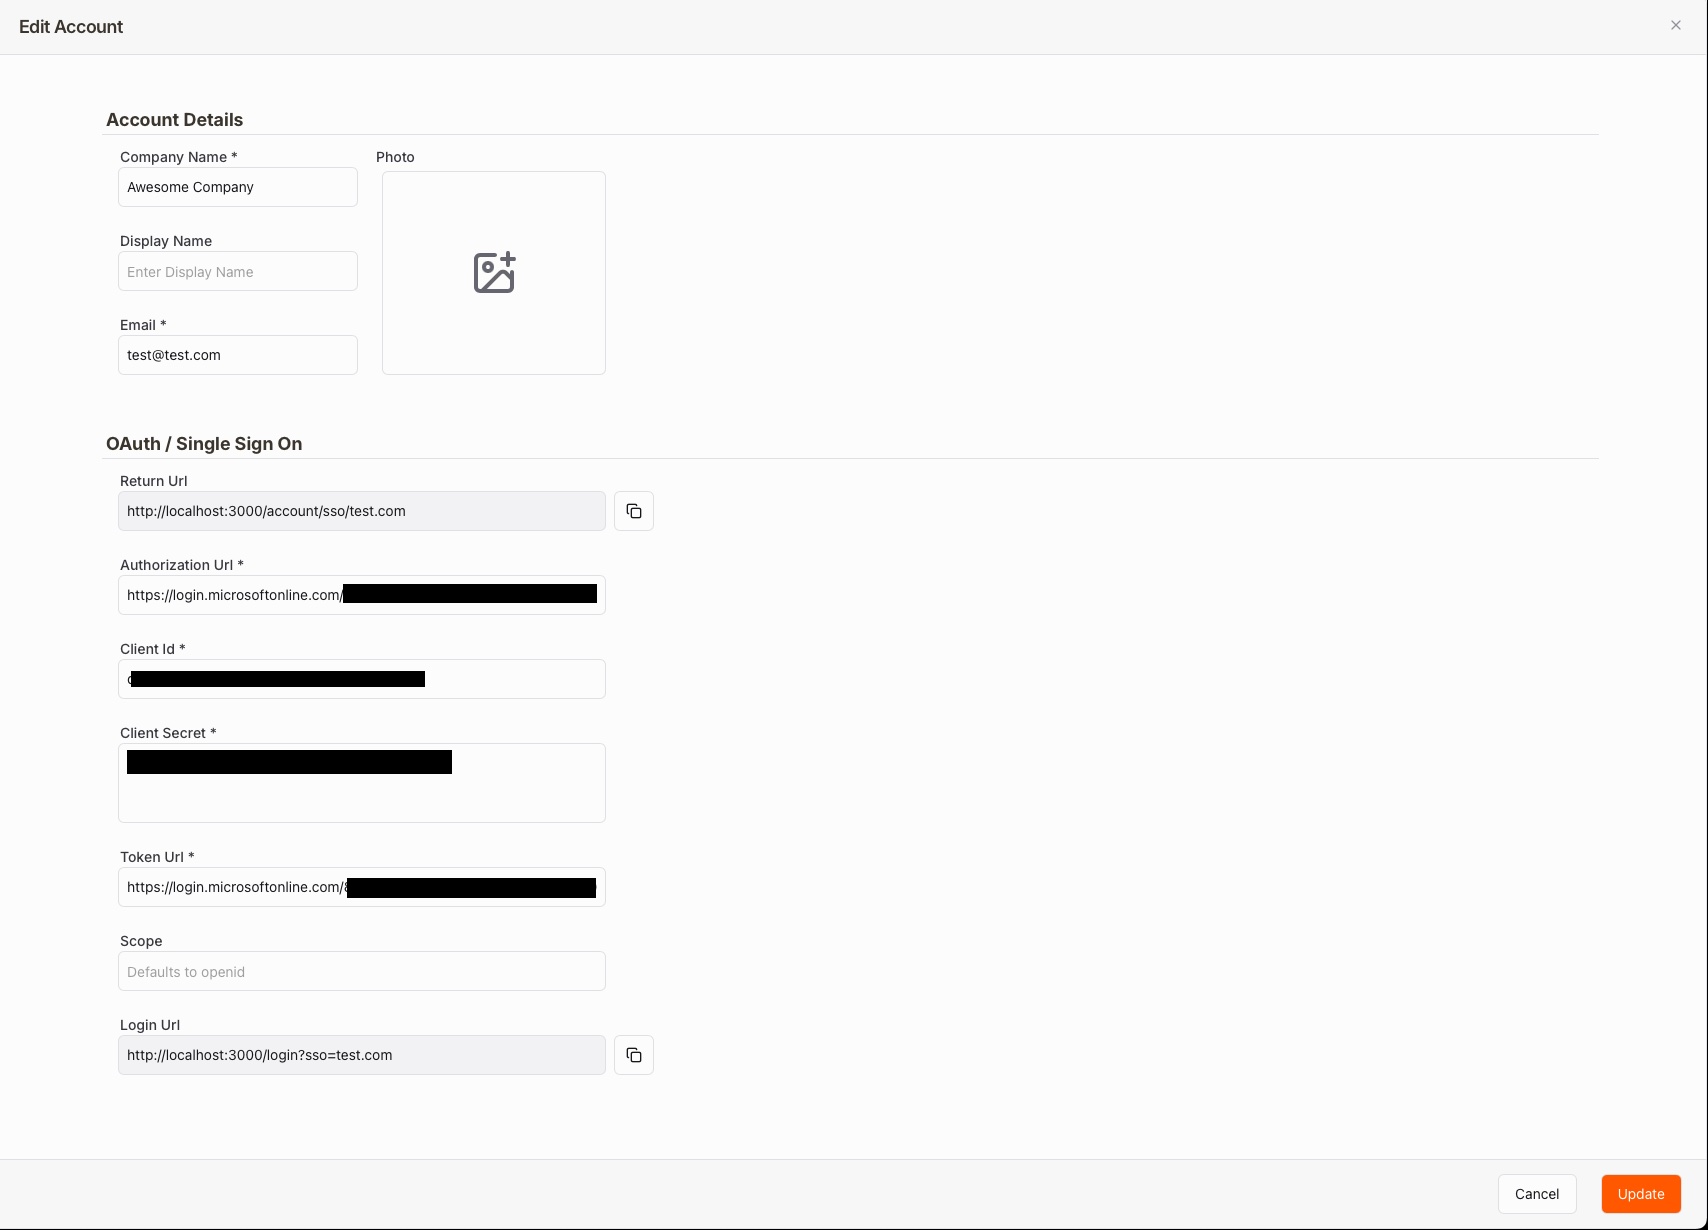
- Authorization Url: Copy the
- Click Update.
- To test, copy the Login Url from ToolWorks OAuth settings and test the SSO login flow in a private/incognito browser window.
How to Log In Using Office 365 SSO
- Navigate to your ToolWorks instance login page.
- Enter your email address associated with your Office 365 account.
- Entry any password (it will be ignored).
- Click on the
Loginbutton. - You will be redirected to the Office 365 login page. Enter your Office 365 credentials.
- After successful authentication, you will be redirected back to ToolWorks and logged in.
💡 You can also log in directly using the SSO Login URL provided in your ToolWorks OAuth/SSO settings.
Additional Notes
- ToolWorks will automatically create a user account for you upon your first successful SSO login if it doesn't already exist.
- If you are manually adding user in ToolWorks, please ensure that the email addresses in ToolWorks match those in Office 365 for seamless user mapping.
- If you encounter any issues, check the Azure AD sign-in logs for troubleshooting.
- You can manage user access and roles within ToolWorks as needed.